

How To Make A Dance Floor In Minecraft
If you are wanting to know how to build a disco floor in Minecraft to add flair to your map, yous accept come to the right place! You will demand to connect hoppers and a redstone comparator to rows of observers and redstone lamps in gild to make information technology happen.
What You Will Demand
Before you lot spring into the steps, y'all will need a few things in your inventory. The basic disco floor will need 4 hoppers, 1 redstone comparator, and every bit many observers and redstone lamps equally you lot want.
Since the latter 2 items will decide how large your floor is, it's up to yous how many y'all will need. To brand 1 redstone lamp, y'all will need 1 glowstone and four redstone grit. For any observer, it volition accept 6 cobblestone, 2 redstone dust, and 1 under quartz.
Obviously, it'southward easiest to make a disco flooring in Creative Mode but you can brand one in your Survival game with enough fourth dimension and effort. You might need fifty-fifty more redstone dust if you intend to aggrandize your disco floor around corners.
Steps to Create Your Disco Floor
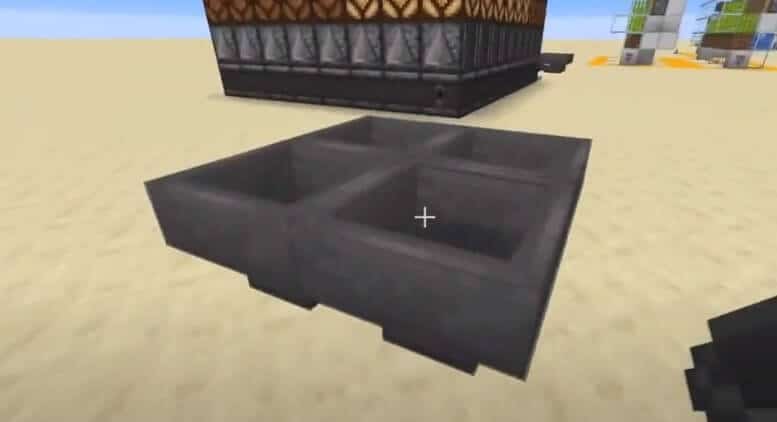
i. To start making your disco floor, place a foursquare loop of iv hoppers that will flow into each other. If you are unsure how they work, dig underneath and you will exist able to see the connections.
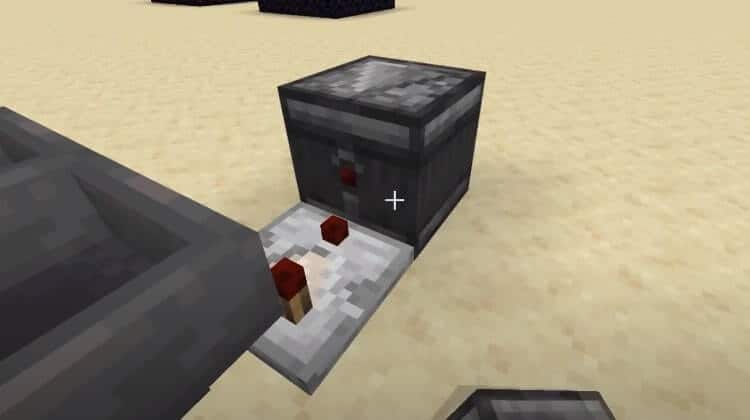
2. Put down a redstone comparator next to any of the hoppers, only make sure that the arrow faces outward. This is the showtime step to powering your disco floor.
iii. Next, place observers in a straight line with the arrows facing abroad from your comparator. This line will determine the length of your disco, so make it as long or short equally you lot want. The easiest way to make the arrows face out is to look at the comparator and walk backwards while placing your observers.
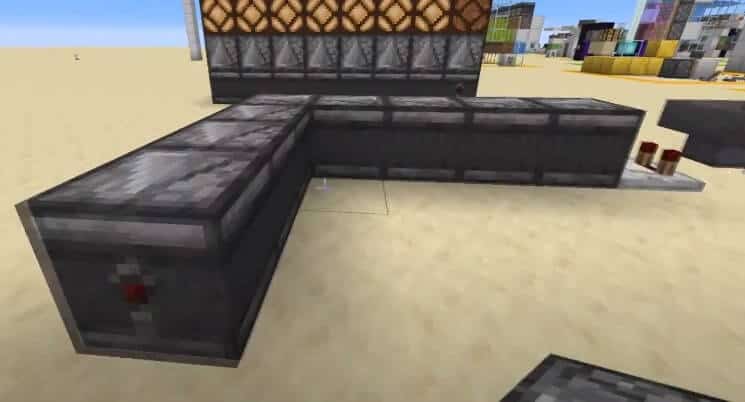
4. With your line of observers placed, put down more observers in columns facing away from the line. These will be the width of your floor. By this signal, yous should have a line of observers from the comparator and columns of observers branching left or right.
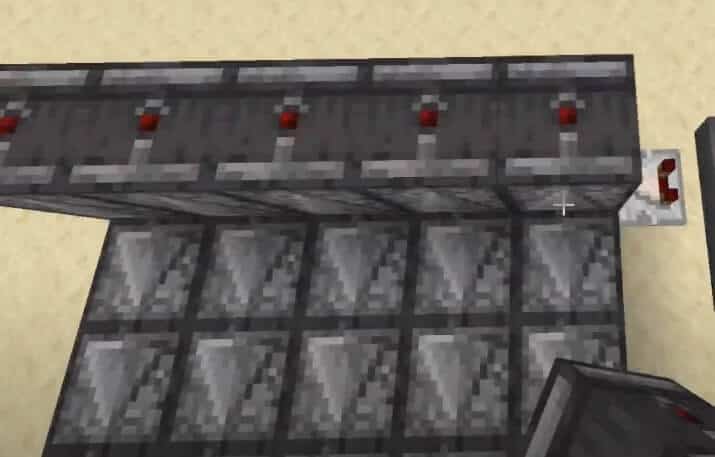
5. Once you've put down the foundation, identify a layer of more observers on tiptop of the floor. These will automatically point upwardly, so you don't accept to worry about directions this fourth dimension.
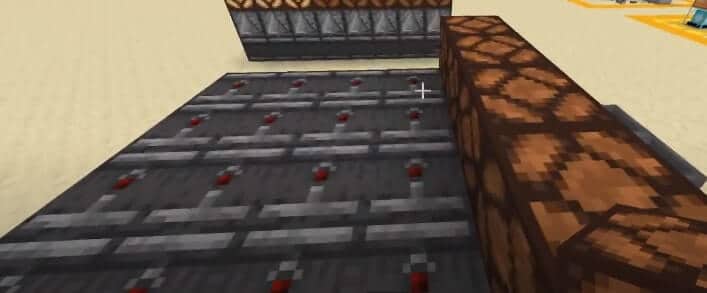
6. Now y'all can put a layer of redstone lamps on top and so that the middle layer of observers powers your lamps.
7. With that done, all y'all have to do is go back to your hoppers and throw any item into them. The dropped detail volition ability your disco floor and it should put on a light prove!
Troubleshooting
If for some reason your disco floor doesn't low-cal up, the about mutual reason to check is that all of the arrows are going in the right direction. Recall that everything substantially has to point abroad from the hoppers.
Make sure that the redstone comparator is facing out and all of the observers on the bottom flow out from at that place. If you put down redstone dust, all of the observers have to turn with it and face up away from the dust.
You will know if your observers are powered because the redstone will brighten and there should exist a scarlet dot on the exterior of the observers. If yous've placed everything correctly, bask your new disco floor!
Wait, In that location's More than!
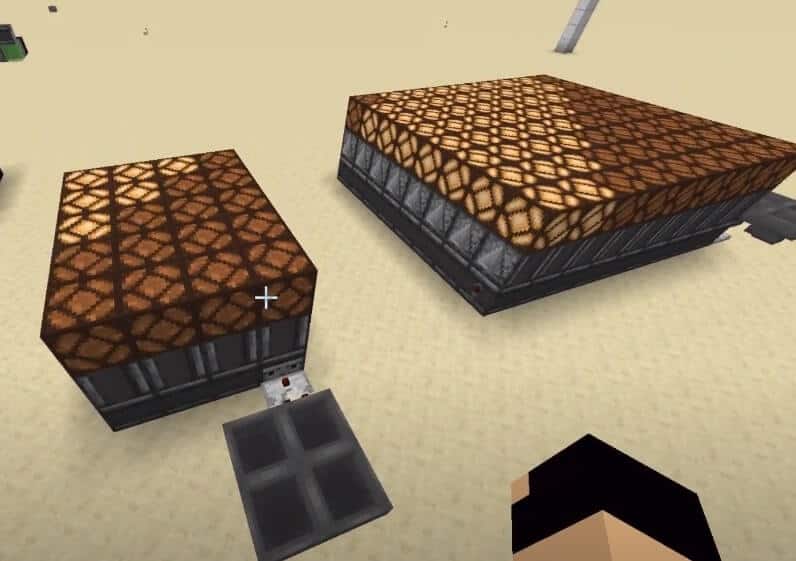
If you want to become more creative, your disco floor can be well-nigh any shape once yous know how to brand it turn corners or wrap around. It's really pretty easy and you probably already have what you need because redstone dust was used to brand the observers and redstone lamps.
In one case your disco flooring is laid down, maybe you want to change direction or connect it to some other disco. All you have to exercise is place redstone dust at the end of whatever you want to exist the corner.
This will permit the flow of power to become another way, but you don't need more hoppers or anything. Just put down observers again with their arrows facing abroad from the redstone dust and add another observer layer followed by a redstone lamp layer.
When y'all're done, the new floor should continue the waves of light coming from the original floor so information technology's just limited to your inventory and imagination. Hypothetically, you could create a disco ophidian across your entire map!
Final Thoughts
We hope you lot enjoyed this disco floor for Minecraft and added to some cool places like in a room in a medieval castle or as office of your fancy apartment building. Regardless where you add it we are sure it will expect great.
Credits: We besides desire to give credit to Rileybbyrne, we followed his tutorial for this article since we thought it was the all-time looking ane out there. He is a Canadian builder with many great videos on his YouTube aqueduct, brand sure to follow him.
Have fun! We retrieve this addition to your builds will make them pretty unique and memorable if yous share information technology with someone.

Source: https://minecraftbuildinginc.com/how-to-build-a-disco-floor/
Posted by: garveyexprion.blogspot.com
0 Response to "How To Make A Dance Floor In Minecraft"
Post a Comment